Low Stress Low Cost Birthday Party

Birthdays have always been special to me because growing up my mom made them that way. We would pick a theme and off she’d go! Every other year I got a big party with lots of my friends and on the off years I got to pick 1 friend and an activity.

One of my most memorable parties was a Murder Mystery theme. As each guest arrived they were greeted at the front to create their “file” with fingerprints, detective name, etc. We played fun mystery games and had to figure out clues to find my hidden cake. I really love that my mom created these wonderful birthday memories for me. So now that I have a child of my own I’m passing on the tradition.

As much as I love throwing a good party, planning it can cause a lot of stress and end up costing more than you wanted to spend. So for my son’s 2nd birthday My goal was to keep it low stress and low cost. I’m happy to report it was successful! So here are some of the ways I accomplished that.

He is obsessed with Baby Shark right now so that was our theme. First, we took a trip to the party store to see what they had.

Tip #1-
Only buy what you’ll need

I knew the adults didn’t care if they drank out of a baby shark cup so I only bought enough for the kids attending the party. The adults got the regular old red solo cups that I already had stocked away in my pantry. Same with the favors.
I bought enough special themed plates for each person to have one and then used plain paper plates I already had as back up.

Party ware

Tip #2
Dollar Tree

I wanted a fun ocean backdrop to hang so I perused the Dollar Tree and grabbed a blue plastic table cloth, some colored poster board, tissue paper pom poms, streamers, & balloons. I was pleasantly surprised to see they have added quite a bit to the party section there! I won’t be winning any awards on this, but it was just to add a little fun to the decor and my son loved it šŸ™‚ You can get much more creative if you want to!

Baby Shark Scenery

Tip #3
Make party time between meals

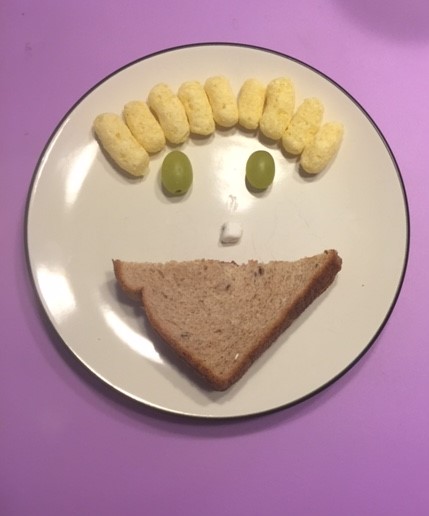
One of the big stress relievers was I chose to do the party between meals so I was only providing snacks and dessert. The pressure to feed everyone enough food for an entire meal was off! We had mini sandwiches (hawaiin rolls w/ turkey & cheese), goldfish, pirate booty, fruit, cucumbers, sea salt chocolates, gummy sharks, and of course cake & ice cream.


Tip #4
Costco

Hawaiin rolls at Costco are so cheap! And you get a lot! Pirate Booty and Goldfish are a great price in bulk as well. Select Costcos do cakes that feed 50 people for under $20. I chose to get our cake from a favorite local bakery BUT Costco cakes are also delicious and we’ve used them in the past.

Tip #5
Stickers

I bought a baby shark sticker book and used the stickers for decorations and games. Cutting out colored card stock I labeled the food with fun ocean themed names and then added a sticker. You can see examples in my food pictures above. I also used the stickers to create a simple Baby Shark Scavenger Hunt. And when the kids found each character I gave them stickers to help mark them off so they knew which ones were left.

Tip #6
Fun but simple extra touches

I love Etsy. They have so many cute, unique, and specialized items! I didn’t want to go overboard with spending so I chose just a couple things for special party touches. One was the cake topper. So so cute! It was personalized too which made it extra special. The other purchase I made was matching family shirts. I had a mommy shark shirt, my husband a daddy shark shirt, and our little guy a baby shark shirt.

Other party details:

  • Shark Ice Cubes – put gummy sharks into ice cube molds for drinks
  • Pail & Shovel – purchased at Dollar Tree to use as snack holders
  • Ball Pit – blow up pool + ball pit balls + slide = so much fun!

Tip #7
Pare down the guest list

Start your list off with the family you’ll be inviting. Both sets of grandparents live near by so they of course were on the list. Then we knew the cousins were going to be in town so they would be attending. After the family, I would recommend choosing 2-3 families that your child is close with. Who do they spend most of their time with when it comes to friends? When the list gets long, the cost for the party goes up. OR you can do the party for your child’s friends only and have a small family celebration separately.

Hope this helps you have a party you can actually enjoy!!! Also, if you have any good tips, leave a comment below.

Cookie Decorating Tips

Mario Brothers, Mickey Halloween, and Coffee & Donuts

7FE2C746-F67B-4B2C-AB0F-04E346F3F9E9

Christmas Cookies

A couple years ago I became interested in a cookie frosting technique called flooding. It makes your cookie look glossy, smooth, and flawless. As a baker this was something I really wanted to try! It started out as something fun to do for my own special occasions but ended in a small side business with a friend.

We started taking Motherā€™s Day orders and then the orders never stopped! I was so nervous in the beginning; stressing over every detail. It took us sometimes 16 hours to do 2 dozen cookies. Iā€™mĀ happy to report now that weā€™re more comfortable and confident, we have been able to cut that time in half šŸ™‚

If you are interested in giving this fun cookie art a try, I have some tips to share with you!

Baking the Cookies

ā€¢ You want a sugar cookie recipe thatā€™s going to give you firm, thick cookies. You want them to keep their shape and be a good foundation for your icing art.

ā€¢ Place raw cut out cookies in the fridge for 5-10 minutes before baking to help them keep their shape.

ā€¢ Be careful of cutters that give you thin areas. For example if you had a margarita glass you wouldnā€™t want the stem to be too thin because then your cookie will break easily.

ā€¢Always make a couple extra cookies. You never know what will go wrong lol

ā€¢ Always set your timer a little lower than what you think it will take to bake the cookies. Then check on them and increase time by 1 minute increments until they are slightly browned around the edges. This will cut down on burnt cookie accidents.

Icing Consistency

ā€¢ When flooding you want the consistency around 8 seconds. This means when you drizzle the icing on top of itself, it should only take 8 seconds before it has melted back into the rest of the icing.

ā€¢ For outlining and writing you want the icing stiff, but still soft. If itā€™s too stiff youā€™ll Ā have trouble getting the icing to flow smoothly.

ā€¢ When using tips that make an imprint such as flowers and leaves, you want the icing very stiff or the imprint will lose its shape.

Decorating

ā€¢ Immediately pop bubbles after flooding or it will leave holes in the icing. Use a toothpick if you donā€™t have the tool needed.

ā€¢ When you need just white colored frosting add a couple drops of white instead of just leaving it colorless. It will give it a crisper look and help with color bleeding.

ā€¢If a color is too dark, just add some white food coloring to lighten it up to the desired color.

ā€¢ Let flooded cookies dry overnight before adding writing or using edible markers to draw eyes, etc. Especially if the flooded color is darker than the writing color, it will bleed if not given enough time to dry. Also the icing will crack under the pressure when using edible markers so you want to make sure itā€™s nice and hard.

ā€¢ Sometimes it takes time to find a comfortable position with your hand when using a decorating bag. If you find your hand is shaking or not able to be flexible, try different positions and use an extra cookie or napkin to practice.

ā€¢ If youā€™re not great at doing fonts with icing, use an edible marker to write it first and then go over it with the icing. Try to use the same color marker as icing youā€™ll be writing with. If itā€™s a different color itā€™s more noticeable if your lines donā€™t line up exactly.

ā€¢ See if you can use a cookie cutter you already have to make something new. This could save you from having to purchase or make a whole new cutter. For example in my Christmas cookies the Santa face was originally a bell.

Probems

Oil Spotting- this is when the moisture from your cookies soak through and create dark spots in your icing.

To try and prevent this I store my cookies on paper towels to soak up extra moisture. If oil spotting has occurred, the best solution is to let it continue happening so that the whole cookie just looks darker in color and you canā€™t tell there was spotting.

My final piece of advice is to just go for it! If youā€™re too scared to try things, youā€™ll never know if you can do it. And even if it comes out bad at first, you can always get better!

Happy Decorating!

If youā€™re just starting out, you can view this YouTube video of me flooding a wedding dress to give you a start:

Weeknight Spinach Tortellini Soup

Tortellini Soup1

I love tortellinis! I used to ask for them for my birthday dinner with alfredo sauce. Pasta filled with cheese. Can’t go wrong there! Today I wanted to add some veggies and put it in a soup to make it a healthier dinner for us. I read through some soup variations and came up with this. I was pleased with the outcome, so here it is! Oh, and big bonus. It’s quick and easy!

You’ll need:

  • half an onion, diced
  • 2 Tbl olive or avocado oil
  • 1 tsp garlic salt
  • 1 14.5 oz can diced tomatoes, undrained
  • 8 oz can tomato sauce
  • 4 cups (or 32 oz) vegetable broth
  • 1 tsp basil
  • Tri Color Cheese Tortellini, 19 oz bag
  • 3 cups fresh chopped spinach (no stems)
  • 1/2 cup grated parmesan cheese
  • 1 cup half and half
  • fresh cracked pepper to taste

Directions:

  1. Pour oil into large stock pot and sautƩ diced onions. Once tender, add garlic salt.
  2. Add diced tomatoes, tomato sauce, broth, and basil. Let come to a boil on medium heat.
  3. Then add the tortellini, spinach, and parmesan. Once tortellini is soft, pour the half and half in. Crack fresh pepper to your liking. Let soup come to a boil again.
  4. Serve and enjoy šŸ™‚


~Fun Lunches~

Here are a few ideas to kick it up a notch at lunch time. Sometimes (or all times) kids can be picky eaters. However, if their lunch looks like a smiley face or their sandwich is in the shape of a Ā bunny rabbit they might be a little happier to eat it. It’s worth a shot right?

I enjoy being a little creative with their lunches, but I don’t want to be spending too much time and energy on it. After all they’re just going to eat it 5 seconds after my masterpiece is finished. So these are very easy ways to just make it a little more colorful and fun.

Colorful Containers – I like to use fun cups like these (Target $1 section) or cupcake liners to put fruit, veggies, goldfish, etc. I don’t know why, but just simply putting food into something colorful makes the same old-same old feel more like new.

Shapes – Most of us already have some cookie cutters. They can be pretty inexpensive if you want to get a few more. I suggest cutting the bread with the shape cutter BEFORE adding the fillers (pbj, mayo and turkey, ham and cheese, etc). Then continue making the sandwich. Otherwise you’re wasting everything that gets cut out.

IMG_4232

Faces – Happy faces! This is one of the boys’ favorites. There are so many different ways you can make a silly face. And don’t feel bad if you have to tell them it’s a happy face lol They will still love it!

A4522D61-87E6-4FB5-9892-16D3898B9232

Pizza Time

Interactive – Making lunch together is a really fun thing to do every now and then! We made little pizzas here and they had a blast. YouĀ can also take this opportunity to teach kitchen safety; ovens are very hot, knives are sharp, only mommy can use this or that, etc.

Other easy interactive lunches for kids:

  1. Corn dog muffins – cornbread batter in muffin tins with a piece of hot dog in the middle
  2. Quesadillas
  3. Pancakes – they can help you make the batter and then watch you cook and flip
  4. Nachos
  5. Calzones

Getting new cups, straws, utensils, and plates every so often is exciting too!

The Dollar Tree carries some and the dollar section at Target is great for that too. The most I spent on these items was $3 at Target for the Minion plate. BA-NA-NA! Sorry, couldn’t help myself.

IMG_4303

Lick it!

New foods can be scary for some children. Or they can get in a rut and just refuse any change. The oldest child I take care of doesn’t likeĀ trying new foods. The unknown of it all scares him. But his mom told me about an approach she heard to help with this. And it has helped him overcome some of his fear and realize he does like other foods. If you’re introducing a new food and they are hesitantĀ about it, they can choose to do one of these 3 things:

  • Bite it
  • Lick it
  • Kiss it

This gives them some reasonable contact with it before completely banishing it to the black list of evil foods.

Now get out there and do some lunch art! šŸ˜‰

Buddy the Elf Christmas Party

We had a Christmas party last weekend and it was a blast! I especially had fun decorating and incorporating a Buddy the Elf theme. That is my favoriteĀ holiday movie! For the dessert table I had a cake with candy canes on top to imitate the 7 levels of the candy cane forest, chocolate peppermint bark, snowflake gumdrops, marshmallows, petite tree cakes, and sugar cookies.

image

Dessert Table

image

Peppermint bark, homemade snowflake gumdrops, & marshmallows

image

We served Coconut Vanilla Bellini’s for a Christmas cocktail. The cup rims are coated in red and green sugar.

image

I printed off quotes from the movie and set them around the party

image

Coffee station with coffee quote:Ā “You did it! Congratulations! World’s Best Cup of Coffee. Great job everybody!”

image

Table Setting: I found a very cute book of Christmas scrapbook papers. I used these as place mats and every setting had a different design.

image

Centerpiece: Pine cone filled basket and 2 large mason jars filled with cranberries and ice. (Secret: that’s not real ice. It’s water and plastic wrap)

Such a fun party! We served Olive Garden lasagna, bread sticks, and salad for dinner. For the entertainment portion of the party we played “Minute to Win it” games and Holiday Family Feud.

11222906_10101282202967192_8688277415567919622_n


Products I Love ā¤ Organic & GMO Free

Recently my husband and I have decided we should really beĀ more aware of what we are eating and putting into/onto our bodies. More information and research is being done everyday about the products we buy. I didn’t realize before exactly how harmful items could be to me because of the ingredientsĀ in them. Luckily, many other people are catching on and companies are realizing that it’s in their best interest to makeĀ more products for health conscious people. So as we are going through this journey of finding things that are organic, GMO free, etc. etc., I have begun to find productsĀ that I really like/enjoy. Here are a few of them:

Snacks

FullSizeRender (3)

From left to right we have:
1) Simply Balanced Granola Bars – You can find Simply Balanced brand items at Target. They haveĀ a wide variety of foods such as snacks, drinks, honey, frozen items, and tea. Some are organic, some are not.

2) Annie’s Snack Mix – Annie’s brand items can be found at both Target and King Soopers (local grocery store). They have a variety of snack crackers and fruit snacks, pasta, granola bars, and frozen foods. Some items have the USDA organic stamp, some do not. I usually only purchase the items that do have it. What does the stamp mean?Ā The USDA organic seal verifies that the product has 95% or more certified organic content. You can read more about it here:

http://learn.eartheasy.com/2013/04/certified-organic-what-does-it-mean/

3) Bark Thins – I love chocolate and always will. So I don’t feel so bad when I eat these because they are non-GMO and the ingredients are fair trade certified.

4) Food Should Taste Good Blue Corn Chips – They were giving bags of these to the 5k Bubble Run participants and I fell in love with them the moment I ate one. They’re tortilla chips but they don’t even need salsa! I just eat them by themselves. The main ingredients are organic blue corn, sunflower oil, brown rice flour, flax seeds, sunflower seeds, sesame seeds, and Quinoa. Found them at King Soopers.

5) Kirkland Salsa – I’m a chips and salsa gal. Love it! This is one of my favorite salsas and it bears the USDA organic stamp of approval šŸ™‚ Costco offers a lot of great organic and non-GMO items. It was also the only place I could find organic frozen chicken breasts.

6) Honest Kids Juice Ā Pouches – The boys I nanny love their juice boxes and this is what I usually get for them. Found at Target and King Soopers.

7) Below is Simple Truth Organic Italian Soda. My husband and I love this stuff! Particularly the Coconut Lime flavor. Simple Truth is a King Soopers brand that makes many different items that are usually very good.
FullSizeRender (1)

Food/Cooking

FullSizeRender (2)

8) Kirkland Organic Coconut Oil – As I’m sure you’ve probably already heard, coconut oil has many many uses. For cooking you can substitute it in for butter, oils, and eggs, to thicken sauces without using dairy, to saute, coffee flavoring, add in your smoothies, non-stick greaser, and cast iron seasoning.

9) Cascadian Farm Cereal – They offer a variety of good tasting cereals (with the USDA organic seal) like Graham Crunch, Fruitful O’s, Cinnamon Crunch, Multi Grain Squares, and more. They also make granola bars, frozen foods, fruit spreads, and juice. I buy this brand at King Soopers. I haven’t looked for it in other stores.

10) Avocado Oil – Found this at Costco and the great thing about it is that the smoking point is around 500 degrees Fahrenheit. It can be used inĀ place ofĀ olive oil.

11) Earth Balance Buttery Spread – I use this for my toast, breads, and sometimes in my cooking. It is a great alternative for people who are dairy free.

Vitamins, Supplements, and Soap:

IMG_1392

GNLD/NeoLife is a company that makes high quality products. They’re GMO free, gluten free, organic, etc.

12) The Pro Vitality Vitamin packs contain 4 vitamins in each individual pack for the day. The Tre-en-en is forĀ optimizing cellular nutrition and enhancing energy. The Carotenoid Complex protects cells and optimizes your immunity. The Omega-3 Salmon Oil Plus balances and regulates your cells and the Essential Vitamin & Mineral Complex nourishes your cells. It bridges the gap prevalent in many of today’s diets and supports digestion.

13) Green – this liquid cleaning concentrate thoroughly and gently dissolves dirt. The uses are endless! It can be used as an organic fruit and vegetable cleaner, shampoo, body wash, hand wash, clothing soap (for hand washing), pet bathing, and cleaning cuts. It also eliminates strong odors fromĀ onions, fish, meat, and animals. We keep one in the shower and one in the kitchen.

14) NeoLife Shake – Love this stuff! I am not a protein shake drinker. Blek! However, I don’t mind these at all. I usually add a banana, and make it with milk and a little bit of ice. Ā It comes out smooth and creamy. These make me feel so good. They’re a great start to your day as breakfast or an afternoon boost. It’s a rich source of protein with 18g per serving, contains 22 amino acids, rich source of fiber with 5g per serving, and contains no artificial sweeteners, colors, or preservatives.

This company has many other products. If you’d like to learn more about GNLD/Neolife products don’t hesitate to email me at perk4308@gmail.com with questions. Many people with health problems have found a wonderful solution in NeoLife.

Beauty:

IMG_1393

From the left:

15) Primal Pit Paste – Not the loveliest of names but man does this stuff work! Best deodorant I’ve ever used. It’s all organic and of course aluminum free. It seems like a small jar but it will last you a while. All my friends that have tried this also love it. They have great scents to choose from like Jasmine, Coconut Lime, Lavender, and Spice. They also carry a non-scented one. Best price will be through their website and they’re always offering coupon codes.

http://primalpitpaste.com/

16) Alba Botanica Very Emollient Body Lotion – Great lotion that really heals my dry hands. I have a dry hand problem but this stuff keeps a handle on it. Alba Botanica also offers sunscreens, body wash, hair products, etc.

17) Coconut Oil – I’ve used coconut oil as a mouth wash, face and body moisturizer, topical stress reliever, and make-up remover.Ā I’ve read you can also use it as a make-up brush cleaner, hair detangler, lip balm, shaving cream (whip it first), sunburn soother, bath booster, and the list goes on and on.

Household Products:

IMG_6412

18) I am currently using Mrs. Meyer’s dish soap, surface cleaner, hand soap, and lotion. These cleaners are earth friendly, and made with plant-derived ingredients and essential oil. They also work great!

19) Method is another household cleaner I use. This Antibac spray for the bathroom is wonderful! My favorite part? It’s such a nice smell! It doesn’t smell like burning chemicals. So the bathroom actually smells nice AND clean.

20) NeoLife also offers cleaning products and laundry soap. The Super 10 multi purpose cleaner is great! My husband used it to clean the shower the other day and said it was awesome. If you’re interested in Neolife, again just shoot me an email! I’ll answer any questions you have.

I hope I’ve helped you out and/or given you some new products to try that you’ll end up loving! I don’t get any money from these companies for recommending them. I just know that its nice to have some suggestions when looking for healthy options šŸ™‚ Feel free to chime in on organic products you love too in the comments below!

Country BBQ Pork Ribs (crockpot)

IMG_1104

BBQ Pork Ribs

Country pork ribs go on sale a lot. So you can get a lot of them for a good price and then freeze them for future meals. My go to recipe for these are throwing them in the crock pot with sliced onions, BBQ sauce, and some spices. They come out tender and delicious! You can use any BBQ sauce you like. I’ve used Sweet Baby Ray’s and Famous Dave’s.

Put the onion slices and garlic salt on the bottom of the crock pot

IMG_1102

Then place the pork ribs on top

IMG_1103

Pour the bottle of BBQ sauce over the ribs

IMG_1104

Sprinkle oregano and chile powder over that and cook on low 6 hours

IMG_1105

Add a side of potatoes or mac n cheese with a steamed veggie and you’ve got yourself a country comfort meal šŸ™‚

Ingredients:

  • Country Pork Ribs (2 lbs)
  • 1/2 an onion
  • garlic salt (about 1/2 tsp)
  • 1 bottle of BBQ sauce (18-20 oz)
  • Oregano (about 1 tsp)
  • Chile powder (amount depends on how spicy you’d like them. I’m not a fan of spicy so I just do a light sprinkling)

Directions:

  1. Put the onion slices on the bottom of the crock pot and sprinkle garlic salt on top.
  2. Place the ribs on top and pour on the bottle of BBQ sauce.
  3. Sprinkle oregano and chile powder and cook on low 6-8 hours.

DIY Cookie Flooding ~AND~ Party Ideas for Little Man Baby Shower

IMG_0893

These mustache and tie cookies were for a baby shower I helped put together. The colors are so fun and I got to do this cookie flooding technique I’ve been wanting to try for a while. The trick is using these bottles:

IMG_0894

Wilton Mini Squeeze Bottles (Amazon)

I watched a few videos and found that some people mixed up their royal icing, outlined the cookies, then added a little water to do the flooding inside the cookie. Others just added the water at the beginning, outlined the cookies and filled it in, all with the same icing consistency. I tried both ways and ended up liking the second way better. As you can see, it takes a few practice cookies to get the hang of it:

IMG_0888

But once I did, I was very happy with it.

IMG_0889

Once you make the royal icing (recipe below), you’ll want to add 1/2 tsp at a time of water until you get the right consistency which is a 10-15 second icing. This means when you take a spoonful of icing and then drizzle a little design, it should disappear back into the icing within 10-15 seconds. If you end up getting it too runny, add in some more powdered sugar. I found this YouTube video very helpful:

Royal Icing Recipe:

  • 4 cups powdered sugar
  • 2 Tablespoons Meringue Powder (bought mine on Amazon)
  • 5 Tablespoons water
  • 1/2 teaspoon cream of tarter
  1. Mix meringue powder and water in stand up mixer until foamy.
  2. Add powdered sugar and cream of tarter and mix on low for about 8-10 minutes. Yes, minutes. šŸ™‚
  3. Transfer whatever royal icing you aren’t adding water to yet in an airtight container because it hardens quickly. So if you’re doing multiple colors, just keep out what you’ll need for the first color, and put the rest in the airtight container.
  4. Mix in your color and then 1/2 tsp of water until icing is right consistency.
  5. Put your 10-15 second icing into the squeeze bottle and outline the cookie. Then fill it in. If there’s some little holes where the icing didn’t quite fill, just take a toothpick and spread a little bit of the outside icing into the hole.

WhenĀ they completely dry, they have a nice gloss to them and you can stack them without messing it up. Here they are on display at the shower:

IMG_0914

The party colors were green and blue with a mustache and tie/bowtie theme. My mom has the new Cricut Explore which was amazing for making the food labels and banner.

IMG_0905

Dessert Table

For appetizers we had bowtie pasta, meatballs & little smokies, sliders, white chocolate m&m popcorn and fruit (in a baby carriage of course šŸ™‚ )

IMG_0912Ā  Ā  Ā  Ā  Ā  Ā  Ā  Ā  Ā  Ā  Ā  Ā  Ā  Ā  Ā  Ā  Ā Ā IMG_0916

IMG_0908Ā  Ā  Ā  Ā  Ā  Ā  Ā  Ā  Ā  Ā  Ā  Ā  Ā  Ā 11426365_10204571828072436_9130237450692937756_n

Drinks were served in mason jars with mustache straws. I cut out the mustaches (with Cricut Explore Machine) and just hot glued them onto some straws.

IMG_0907

There was a photo booth where you could take silly photos with props and hats. You could also get a finger mustache tattoo there because those are awesome!

IMG_0910Ā  Ā  Ā  Ā  Ā  Ā  Ā IMG_0911

IMG_0915

Some other details were the chalkboard sign with a To Do List

IMG_8717

Envelopes to write your address for thank you notes

IMG_8715

And favor boxes with small cookies

IMG_0918

Chicken and Rice Burrito Bowls (crockpot)

IMG_0736

Chicken and Rice Burrito Bowl

I love getting the burrito bowls at Qdoba’s or Chipotle’s. I made my own version in the crockpot at home and it turned really good! Just 5 ingredientsĀ and it cooks on low 4-6 hours.

IMG_0737

My crockpot tends to cook fast so it only took 4 hours for me. Then you shred the chicken, mix it back in the crockpot with the other ingredients and its ready to be served on rice.

IMG_0739

Top with your favorite stuff, ie: cheese, sour cream, avocado, etc. It’s easy enough for a weeknight!

Here are the ingredients:

  • 3-4 chicken breasts
  • 1 packet of taco seasoning
  • 1 can whole kernel corn
  • 1 can black beans
  • 1 cup salsa
  • Rice (cooked)
  • Desired toppings

Directions:

  1. Lay your chicken breasts in the crockpot. Mine were frozen because I know my crockpot cooks fast. Then sprinkle the taco seasoning on top.
  2. Pour the salsa, corn, and black beans in and cook on low 4-6 hours. When the chicken is done, shred it and mix it back in with the other ingredients.
  3. Cook your rice how you like it. I used a rice cooker and added lemon and cilantro.
  4. To serve we layered rice first, added the chicken mix, and then added cheese, sour cream, and avocado.
  5. Enjoy!

Southwest Sunburst Salad

IMG_0684

Southwest Sunburst Salad

I found this recipe a while ago in college and my roommate and I loved making it. It’s so yummy and tastes nice and fresh! Its got all the elements of a good salad including protein, crunch, amazing dressing, and low effort. Yes! šŸ™‚

Chop up some iceberg lettuce, grill up the chickenĀ on the George Foremen with some grill seasoning, drain some corn and black beans, slice a cucumber if you’d like, and whip up the ranch avocado dressing. For the final touch, crush some tortilla chips on top. Believe me, the crunch of the chips is great and a necessity in my book! Also, you may find yourself just dunking whole tortilla chips in the leftover container of dressing. Its fine, in fact its more than fine. It’s delicious! hehe

Ingredients:

  • Iceberg Lettuce
  • Grilled chicken
  • Whole kernel sweet corn
  • Black beans
  • Cucumber
  • Tortilla chips or strips
  • Ranch Avocado Dressing

Dressing Ingredients:

  • 1 cup Mayo
  • 1 cup Milk
  • 1 Ranch dressing mix packet
  • 8 oz GuacamoleĀ dip

Directions:

  1. Chop up the amount of needed lettuce depending on how many people you are feeding.
  2. Season and grill one chicken breast per person/salad.
  3. Drain the corn, drain and rinse the black beans. Cut up the cucumber. The amounts of these will also vary depending on how many people you are feeding. These are all toppings so usually just a handful per salad.
  4. To make the dressing, mix the mayo, milk, ranch packet, and guacamole dip until smooth. Put in an easily pour-able container.
  5. Put the lettuce on each plate, top with a handful of corn, black beans, and cucumber. Slice the cooked, grilled chicken and add to the salad. AddĀ a handful of crushed tortilla chips and drizzle on your dressing.
  6. Enjoy!